21 October 2026
How to change a tyre in 10 steps
5 minutes
|
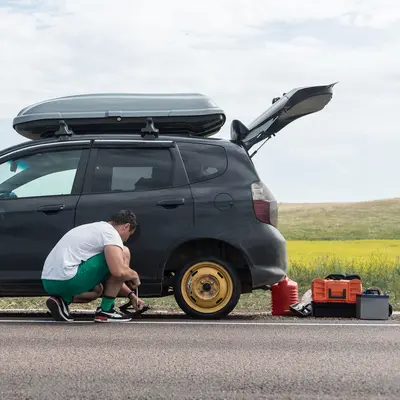
Getting a flat tyre or puncture can quickly turn a good day into a frustrating one. Many drivers don't know how to change a tyre, but the good news is it's a fairly quick and easy process with the right equipment.
In this step by step guide, we'll walk you through the tools you'll need and how to change a tyre quickly and safely, so you can be back on the road in no time.
What's covered:
Looking for car insurance cover? Get in touch with us! A member of the Howden team would love to help |
What tools do you need to change a tyre?
You will need:
Spare wheel
Car jack to raise the car
Wheel wrench to remove the wheel nuts
Wheel nut key / locking key if your wheel has locking nuts
Wheel chocks (you can also use bricks) to stop the car rolling away
Warning triangle to alert other drivers to a hazard/obstruction
Reflective jacket to make you visible
Pair of gloves to keep your hands clean
Torch if it's dark
Tyre pressure gauge to check your spare tyre is inflated to the correct level
How to change a tyre in 10 steps
1. Secure your vehicle
Before you start changing a tyre, make sure you're parked in a safe location off the road. Pull over in a car park, lay-by, or a wide hard shoulder where possible, and avoid stopping on busy roads.
Park on a flat, stable surface away from traffic. Avoid grass, gravel, or uneven ground where the jack may sink.
Switch on hazard lights immediately to warn other drivers.
Wear a high visibility jacket if you have one, and position a warning triangle 45 metres behind your car to alert oncoming drivers.
Note: If you are on a fast dual carriageway, motorway hard shoulder, or anywhere other drivers pass at high speed, do not attempt a tyre change - call roadside assistance instead.
2. Position wheel chocks
Wheel chocks prevent the car from rolling while it's jacked up. Position the wheel chock against the opposite wheel to the one you're changing. For example, if you're replacing the left front tyre, position the chock behind the right rear wheel, and vice versa.
Ideally you should be parked on a flat surface, but if you're parked uphill place wheel chocks behind the downhill wheels and if you're parked downhill, in front of the uphill wheels.
Tip: You can use bricks or large rocks if you don't have wheel chocks.
3. Loosen the wheel nuts while the car is on the ground
Loosening the wheel nuts while the car is on the ground is easier and safer to do because the tyre's contact with the road stops the wheel from spinning.
Remove the wheel cover or hubcap first if you have one, using the flat end of the wrench if needed.
Fit the wheel wrench onto each nut and turn in an anti-clockwise direction to loosen the wheel nuts until until you can turn them by hand. Don't completely remove them yet.
If your car has locking wheel nuts, use the locking wheel nut key.
4. Jack up the car
You should always use the correct jack points to avoid damaging the vehicle. Check your vehicle handbook to find the specific jacking points.
Place the jack at the side of the car close to the punctured wheel.
Jack carefully and slowly, pumping or winding the car jack until the flat tyre is roughly 10–15 cm off the ground.
Tip: If you're on uneven ground, placing a small plank of wood or something flat under the jack base will help keep it stable.

5. Remove the flat tyre
With the car raised, remove the wheel nuts by hand or with the wrench. Then, gripping the tyre by the sidewalls, gently pull it straight off the hub. Place the removed flat tyre flat on the ground.
Tip: Leave the top wheel nut until last to make it easier to lift the tyre away with both hands.
6. Mount the spare wheel
Lift the spare car tyre carefully (it can be heavy) and slide it onto the exposed hub bolts or in line with the wheel nut slots.
Refit the wheel nuts by hand, turning clockwise until finger-tight. Start with the top nut to hold the wheel in place.
7. Partially lower the car and tighten the wheel nuts fully
Lower the jack slowly until the new tyre just touches the ground but is not fully lowered. Then, fully tighten the wheel nuts using your wrench.
8. Lower the car completely and stow your equipment
Fully lower the car until all weight is on the tyre, then remove the jack.
Give each wheel nut a final check with the wrench now that the car fully rests on the ground.
Store your flat tyre in the boot along with all the other equipment.
9. Check spare tyre pressure
The job isn't finished until you confirm the spare is safe to drive on.
If you have one, use a tyre pressure gauge to check the spare tyre is fully inflated before driving. You can check what your tyre pressure should be in your car handbook.
If you don't have a pressure gauge, drive carefully to the nearest petrol station to use one there and pump up the tyre to the recommended pressure.
10. Drive to a garage or tyre fitters
Spare tyres are only meant for temporary use, so you shouldn't drive on a space-saver spare wheel for any longer than necessary.
Take your punctured tyre to a garage for repair - a specialist will advise if your punctured tyre can be repaired or whether you need a full tyre replacement.
5 tips to avoid getting a flat tyre in the future
To avoid getting a flat tyre, you should:
Check your tyre pressure every 2–4 weeks and before long journeys, including the spare hidden under the boot floor. A fully inflated tyre is far less vulnerable to damage.
Inspect tread wear, sidewalls, and valve caps regularly, looking for cuts, bulges, or embedded nails.
Avoid potholes, debris, and mounting kerbs at speed - these are common causes of a front tyre blowout or sidewall damage.
Be mindful of your vehicle's payload limits. Excessive weight strains sidewalls and increases the risk of a blowout.
Book annual or seasonal tyre checks at a trusted garage and consider winter or all-season tyres for cold or wet climates.
Looking for car insurance cover? Get in touch with us! A member of the Howden team would love to help |
This is a marketing article from Howden Insurance. The information in this guide is accurate at time of publication. This content is provided for general information only and does not constitute financial or insurance advice.
More resources
Latest insurance guides
Whether you're looking for information on car, home, travel, life, or health insurance, we've got you covered with expert insights and easy-to-follow guides. Explore our articles to make informed decisions and safeguard your future with confidence.
Related Products
Helping to save you money, without compromising on cover. We listen to your needs and help find the policy that’s right for you — at our best possible price.
Don’t be left stranded. Get your hands on breakdown cover that responds when you need it most.
We strive to help you save time and money when searching for van insurance.
Drive with confidence knowing you're covered for accidental damage, fire, theft, and more - no matter who's at fault.